 |
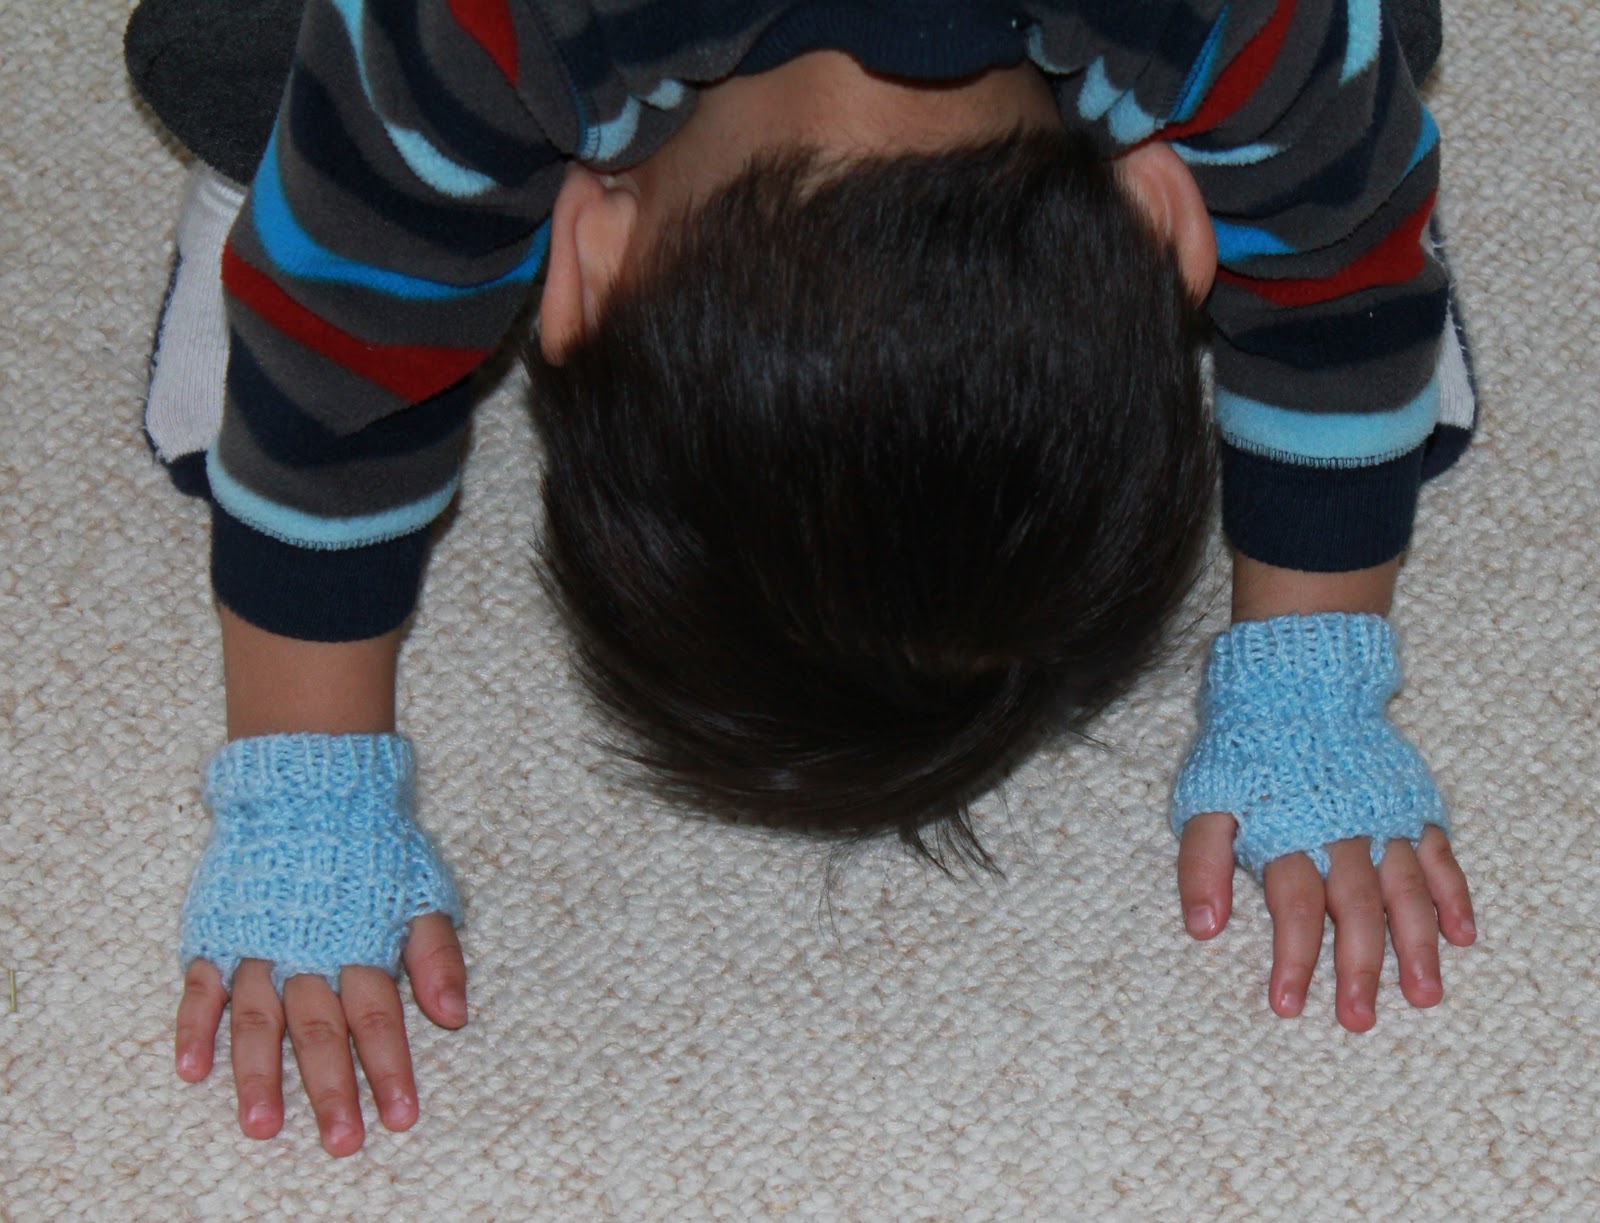
| His upside-down stance :) |
 |
| Stockinette on the palm |
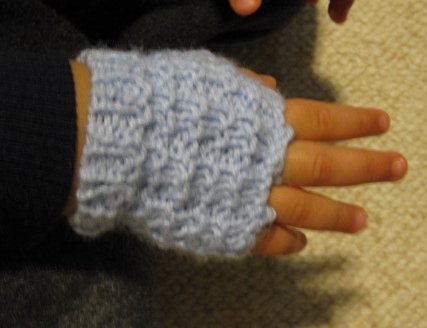 |
| Pattern on the back of hand |
For my 2 year old, it's IMPOSSIBLE to get him to wear mittens! He feels like I am binding his fingers, and will go into a screaming fit! He'll wear gloves, but they are too big! So he dislike it as his "bulgy" finger hinder his activities. Aside from infant mitts, nothing seems to fit. So what else can a knitchetholic mom do to keep his little hands warm?! Make one! :)
This is knitted in rectangle, with increase around the thumb. Then BO for the thumb opening. The finished piece is then seam together. To hold the hand warmer form slipping down when worn, I crochet chains and attached it using surface crocheting.
I didn't document every step as I knitted. Please pardon any mistake, if there's any, as I wrote this after I've finished the hand-warmer.
Needle: Size 2 (2.75 mm)
Hook : 3.25 mm
Yarn: Bernat Baby Sport in Baby Blue
Size: 2.25" in width, 2.75" in height
2 Stitch marker
Term used:
CO - cast on
RS - right side (with your project facing you, cast on tail hangs on the right)
WS - wrong side
patt st - pattern stitch
pm - place marker
m1L - make one left (this is an increase) m1L video - 3rd one down on the right side
BO - bind off
sl st - slip stitch (crochet term)
sl st - slip stitch (crochet term)
Rib 1x1
* k, p; rep from * to end
Pattern Stitch
1) *k2, p1; rep from * 3x
2) *k1, p2; rep from * 3x
3) *k2, p1; rep from * 3x
4) k12
For both hands:
CO 26
Rib 1x1 til piece measures 0.5", ending on the RS.
K on WS.
RIGHT HAND:
1) With RS facing, work row (1) of patt. st (total of 12 stitches), k2, k12.2) p 12, p2, work row (2) of patt st
3) Work row (3) of patt st (12 sts), [pm, m1L, k2, m1L, pm,] --> increase for thumb, k12
4) p to marker, work row (4) of patt st
5) work row (1) of patt. st (total of 12 stitches), k to end. --> the sts within marker is for the thumb
*6) p to marker, work row (2) of patt st.
7) work row (3) of patt st, k to end.
8) p to marker, work row (4) of patt st.
8) p to marker, work row (4) of patt st.
9) work row (1) of patt st (12 sts), [pm, m1L, k4, m1L, pm] --> total 6 sts, k12
Work the highlighted rows, increasing for thumb every 5th row. Work until you have a total of 8 sts for the thumb increase (these are the sts that are within the marker).
When you have 8 sts in thumb increase, repeat row *
Shaping Thumb Opening
1) With RS facing, continue to work patt st (this should be row (3) of the patt st), BO 8, k12
2) p12, CO 3 (using m1T - 2nd one on the left side), work row (4) of patt st
3) Work row (1) of patt st, k to end
4) p15, work row (2) of patt st
5) Work row (3) of patt st, k to end
6) K each st, and BO
Do not fasten off. Using crochet hook, sl st in next 3. Seam the knitted piece, then finish off the crochet chain.
Refer to Diagram 1, use crochet hook, sl st to stitch before the "crease" (refer to Diagram 2), attach to the "crease". See diagrams for further instructions.
Refer to Diagram 1, use crochet hook, sl st to stitch before the "crease" (refer to Diagram 2), attach to the "crease". See diagrams for further instructions.
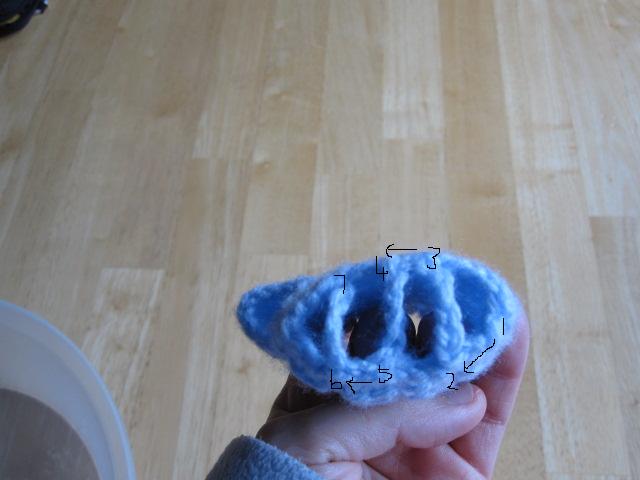 | ||
| DIAGRAM 1 From 1 (where knitting ends), sl st to (2), attach using sc. Ch-4, attach at (3). Sl st in next 3 stitches to (4). Ch-4, attach at (5). Sl st in next 4 stitches to (6). Ch-4, attach to (7). Fasten off. |
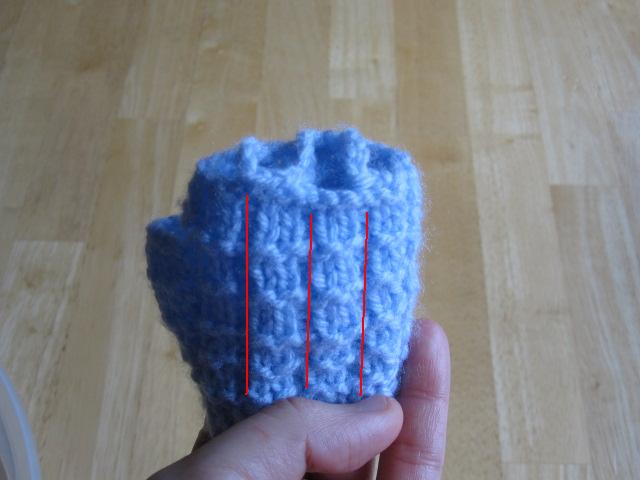 |
| DIAGRAM 2 Use the "crease" (red lines) as guide when attaching the crocheted chain. Each "column" should hold one tiny finger. :) LEFT HAND: 1) With RS facing, k14, work row (1) of patt. st (total of 12 stitches). 2) work row (2) of patt st, p14. 3) k12, [pm, m1L, k2, m1L, pm,] --> increase for thumb, work row (3) of patt st (12 sts), 4) work row (4) of patt (end at 1st marker), p to end 5) k to 2nd marker, work row (1) of patt. st (total of 12 stitches). *6) work row (2) of patt st, p to end. 7) k to 2nd marker, work row (3) of patt st. 8) work row (4) of patt st, p to end. k12, [pm, m1L, k4, m1L, pm] --> total 6 sts, Work row (3) of patt st (12 sts). Work the highlighted rows, increasing for thumb every 5th row. Work until you have a total of 8 sts for the thumb increase. When you have 8 sts in thumb increase, repeat row * Shaping Thumb Opening 1) With RS facing, k12, BO 8, continue to work patt st (this should be row (3) of the patt st). 2) work row (4) of patt st, CO 3, p12. 3) p15, work row (1) of patt st to end. 4) work row (2) of patt st, p to end. 5) p15, work row (3) of patt st. 6) K each st, and BO Repeat crochet chain like for right hand. |
No comments:
Post a Comment