Need to clear off my yarn stash before I can add anymore. So this project is great for using up all the leftover yarns or in my case, I-can't-control-myself- and-over-bought yarns!
 |
| Forest Fairy Wig |
 |
| Traditional Chinese Girl |

Size: 22" in diameter
Hook: I (5.0 mm)
Yarn used:
100% AC Moore Mill Ends Cotton in Black (Chinese Girl Hair)
AC Moore Acrylic Mill Ends in Green (Fairy Forest Wig)
Stitch Used:
Dc dec – yo, insert hook into st and pull up a lp, yo and pull through 2 lps, yo, insert hook into next st and pull up a lp, yo and pull through 2 lps, yo and pull through all 3 lps.
Rnd 1
Using Magic Loop method, ch 3 (count as 1 dc), work 11 dc into loop – (12 sts). Join to top of Ch-3.
{Alternately, without Magic Loop method: ch 4, dc into 4th ch from hook. 11 dc into the same ch}
Rnd 2
Ch-3, 2 dc in each st, 1 dc in joining ch, join to top of Ch-3 – (24 sts)
Rnd 3
Ch-3, [Dc in next st, 2 dc in next st] to end, 1 dc in joining ch, join to top of Ch-3 – (36 sts)
Rnd 4
Ch-3, [Dc in the next 2 sts, 2 dc in next st] to end, 1dc in joining ch, join to top of Ch-3 – (48 sts)
Rnd 5
Ch-3, [Dc in the next 3 sts, 2 dc in next st] to end, 1dc in joining ch, join to top of Ch-3 – (60 sts)
Rnd 6
Ch-3, [Dc in the next 4 sts, 2 dc in next st] to end, 1dc in joining ch, join to top of Ch-3 – (72 sts)
Rnd 7
Ch-3, Dc all around – (72 sts)
Rnd 8
Ch-3, [Dc in the next 4 sts, dc dec] all around, join to top of Ch-3– (60 sts)
Rnd 9
Dc all around – (60 sts)
Rnd 10:
Sc all around - (60 sts). Fasten Off.
How to Tassel:
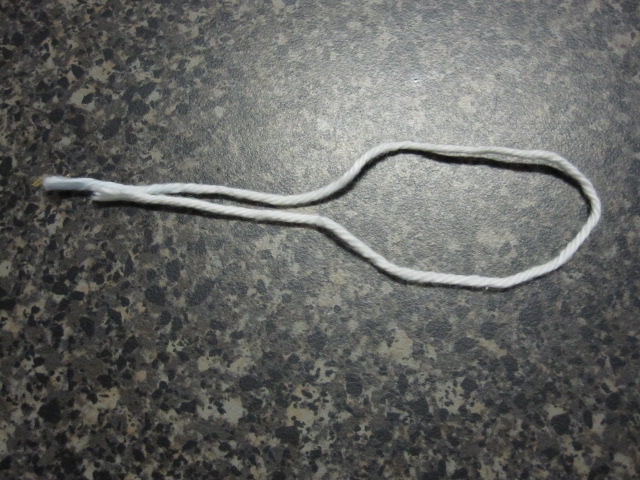
 |
| One strand |
 |
| Half it |
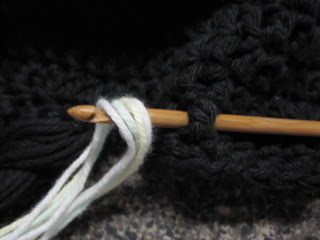 |
| Using a large hook, insert hook through post of dc |
 |
| Pull through |
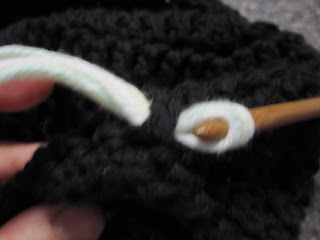
 |
| Make a large loop |
 |
| Grab the "tail", and pull through loop |
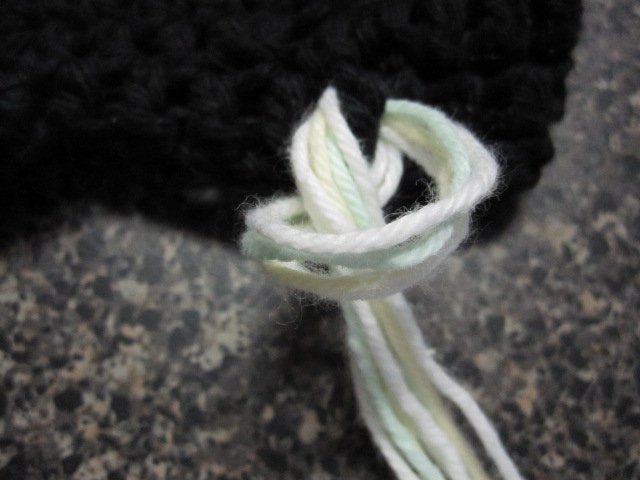
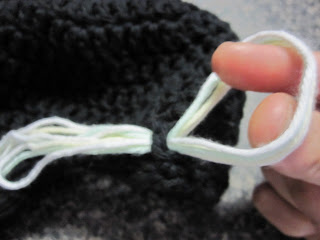
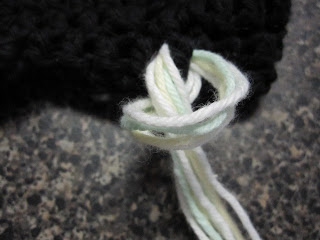 |
| Pull downwards |
 |
| Give each strand a tug to tightened. |
Fairy Wig:
- Put the "hat" on and mark where you want the fringe to start and stop.
- Measure how long your want your fringe, double that length. Now fold any piece of paper (or cut a cardboard) to that length (make sure you fold it several times to get a good thickness), then wind around the folder paper/cardboard at least 10x. Cut yarn on both ends. Now you have the strands of "hair", and you're ready to tassel it to the "hat". If you don't have enough "hair", just make more as you go along.
- Take 2 strands of "hair", and tassel through every row (or every other row if you find your wig too full) on the post of dc, and on every other stitch. Each tassel would have 4 strands.
- Repeat the same for the length of the side and back. When making the "hair" for the back and side, as it is much longer than the fringes, I sat on the floor, heel firmly on floor, toes up, and wind the yarn round my toe-thumb! ;-) This is easier than trying to find an object or trying to cut a cardboard/paper to the length desired.
- When you're done, put the wig on and give it a trim. This is the most FUN in making this project, getting to play hair stylist ;-)
- To give it a finishing touch, add clips, pins, ribbons to your liking.
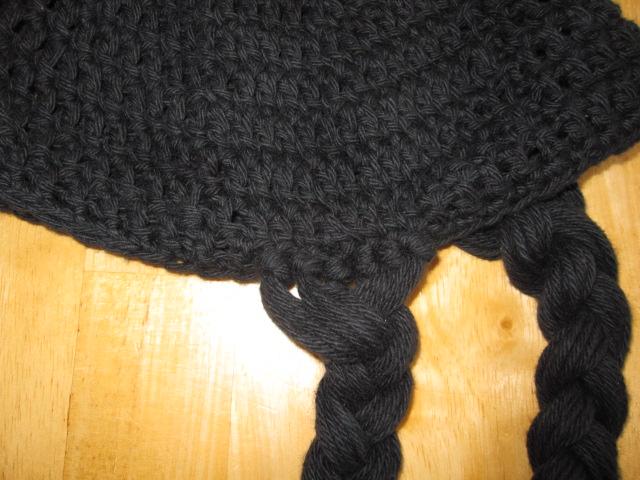
Chinese Girl Hair:
 |
| 6 tassels on last row of dc post |
- I didn't need to add any fringe as my daughter has black hair, and it camouflage really well. All I needed to do is add the braids.
- Put on "hat", mark on the last row of dc, just behind the ears, where the braids will start.
- Cut the length desired. I used my staircase post to wind this wig.
- With 4 strands of yarn (this would double to 8 strand when tassel-in), tassel to the last row of dc post (where marker is).
- Continue to add 5 more tassel - total of 6 tassels.
- Take 2 tassels (16 strands of "hair") each, and start braiding.
- Tie off end of braid with bands and add ribbon or any cute hair accessories. Trim the bottom, so it's even, if needed.
No comments:
Post a Comment